
From the Desk of Victor, Fence Expert
Twelve years.
That’s how long I’ve been installing fences across this state, dealing with conditions most contractors from, say, Tennessee or Oregon would encounter once and immediately walk away from. The windswept plains near Minot where you can watch weather systems roll in from miles away. Suburban backyards in Fargo where folks want privacy but also, let’s be honest, zero interest in spending weekends maintaining the thing.
I’ve witnessed spectacular successes. And catastrophic failures, usually separated by one decision made during installation that seemed insignificant at the time.
When temperatures drop to negative sixty degrees and summer heat pushes past one hundred twenty, your fence either survives or becomes expensive kindling. There’s not much middle ground here.
This guide contains everything I’ve learned about selecting, installing, and maintaining fences that actually last. Whether you’re protecting livestock on a ranch or just want to keep your neighbor’s yappy dog from staring at you while you grill, this should help you avoid the costly mistakes I see repeated every single spring.

Why North Dakota Fences Need Special Consideration
Last February my phone rang.
Panic in the voice, the kind you hear when someone just watched thousands of dollars collapse. A Fargo homeowner, his two-year-old wooden fence completely failed. Posts heaving out of the ground like the earth was actively rejecting them. Boards split clean down the middle, entire sections leaning at angles that made you wonder if a tornado had passed through.
The fence cost him four thousand dollars.
The contractor buried posts only thirty-six inches deep.
“Nobody told me about frost line,” he said.
I hear this story every spring. Different people, same brutal lesson. North Dakota’s climate doesn’t just test fences, it actively punishes them in ways most people don’t anticipate until they’re standing in their backyard staring at wreckage.
At Fence Contractor HHI we’ve installed thousands of fences across North Dakota’s challenging climate over twelve-plus years. We understand frost heave, wind load, freeze-thaw cycles, not from textbooks but from living and working here through every brutal season. Every installation meets or exceeds the standards outlined in this guide. Posts set to verified local frost depths, belled footings, premium materials rated for negative forty degree performance. Contact us for a free consultation and let our experience protect your investment. We guarantee our work survives North Dakota winters because we know how to build for them.
The Brutal Climate Reality
North Dakota creates what I call a perfect storm for fence destruction.
Extreme Temperature Swings
Consider this. North Dakota holds temperature records spanning one hundred eighty-one degrees, from a record low of negative sixty degrees in Parshall back in February 1936 to a scorching one hundred twenty-one degrees in Steele in July that same year. Even typical years see winter lows around negative forty and summer peaks exceeding one hundred. Materials expand and contract constantly, stressed way beyond what manufacturers in moderate climates design for.
Wood splits. Cheap vinyl cracks like eggshells left out overnight. Metal fasteners work themselves loose, slowly at first, then all at once.
Relentless Wind
Average wind speeds hover around eleven to twelve miles per hour, which sounds manageable until you remember those are averages. During severe spring derechos and winter blizzards, wind gusts can reach ninety to over one hundred miles per hour, and a solid six-foot privacy fence acts exactly like a sail on a boat you never wanted to launch.
The pressure on posts and panels becomes tremendous.
I’ve seen improperly installed fences blown completely flat after one storm. Not damaged. Flat.
Freeze-Thaw Cycles
Between November and April we experience repeated freeze-thaw cycles. Water seeps into microscopic cracks, freezes and expands by approximately nine percent, then thaws and contracts. Each cycle widens the damage. It’s like flexing a paperclip back and forth, eventually it snaps, just takes time.
Wood develops splits, concrete breaks down, connections weaken. After five winters an untreated wooden fence can look twenty years old.
Snow Load
Drifts can reach significant depths against fence lines, particularly during severe winter storms. That lateral pressure becomes especially brutal on solid privacy fences where snow has nowhere to go except pile higher and push harder.
The weight alone bends panels and snaps posts.
The Frost Line Factor: Why Depth Actually Matters
Here’s the single most important concept for fence installation here.
Frost line depth.
And this is where many online guides get it wrong. The frost depth varies significantly by municipality, and you need to verify with your local building department, not rely on outdated information.
Critical Frost Depths (Verified from Local Building Codes):
- Fargo: 54 inches (4.5 feet)
- West Fargo: 52-54 inches (verify with building department due to conflicting documentation)
- Bismarck: 48 inches below finished grade
- Minot: 48 inches
- Williston: 48 inches
- Grand Forks: Verify with local building department
- Dickinson: Verify with local building department
This is the maximum depth the ground freezes during winter, and when water in soil freezes it expands, creating an upward force called frost heave.
Think of it like ice cubes forming in a tray, except the tray is the earth and your fence posts are sitting right in the middle of the expansion zone.
This force lifts concrete foundations and cracks basement walls. It pushes fence posts completely out of the ground. I’ve measured frost heave displacement of three to four inches on improperly installed posts, and by spring those posts just sit there loose in oversized holes, wobbling when you breathe on them.
Fence becomes useless.
The Non-Negotiable Rule
Posts must extend below the frost line by at least six inches. For a standard six-foot fence in Fargo that means posts get buried fifty-four inches deep minimum, over half their total length underground, which surprises people every time I explain it.
The second critical technique? Belling the bottom.
You widen the hole’s base by six to eight inches to create a mushroom shape. This anchor prevents upward movement during freeze cycles. Skip this step and frost heave wins eventually. Not might win. Will win.
North Dakota as a “Fence-In” State
North Dakota operates under fence-in livestock laws. Livestock owners bear full responsibility for containing their animals.
Neighbors aren’t required to fence livestock out.
For ranch and farm owners this creates legal obligation to maintain functional fencing. Your cattle wander onto a highway because your fence failed? You’re liable for damages and potential injuries. A legal fence under state code must be at least four and one-half feet high and constructed of rails, timber, boards, stone walls, wire, or any combination thereof.
For suburban homeowners this law primarily affects property line disputes. Install a fence directly on a boundary line and both neighbors technically share maintenance costs unless you’ve got written agreement stating otherwise.
Get that in writing.
I’ve inspected hundreds of failed fences across North Dakota and in ninety-five percent of cases the root cause was posts installed above frost line. When a contractor tells you “thirty-six inches is fine” or doesn’t know the exact frost depth for your municipality, they either don’t understand local conditions or don’t care about quality, and honestly I’m not sure which is worse. Walk away.
Victor Bravo, Project manager

Best Fence Materials for North Dakota: Detailed Comparison
No single material works for every situation, which would make life easier but that’s not how this works.
The right choice depends on your specific needs: privacy, livestock containment, aesthetics, budget, and critically how much maintenance you’re actually willing to commit to versus how much you think you’ll commit to on a Saturday morning in July.
1. Vinyl (PVC) Fences: The Low-Maintenance Champion
Vinyl fencing has surged in popularity across Fargo and Bismarck suburbs over the past decade.
For good reason.
What It Is
High-quality vinyl uses virgin polyvinyl chloride formed into interlocking panels and posts. The material gets extruded under heat and pressure creating dense weather-resistant structure. Think of it like industrial-grade Tupperware engineered to withstand apocalyptic weather.
Performance in North Dakota Climate
Premium vinyl, and I’m talking point one three five inches or greater wall thickness here, handles extreme cold remarkably well. I’ve seen quality vinyl fences survive fifteen-plus winters without a single crack. The material’s flexibility allows it to handle temperature swings without becoming brittle.
Key word: premium.
Cheap thin vinyl made from recycled PVC fails catastrophically here. I’ve documented cracks appearing after a single winter when temps dropped below negative twenty-five. Failures typically occur at stress points: corners, gate hinges, anywhere panels connect to posts.
Advantages
Zero rot or rust. The material is impervious to moisture. Never requires painting, staining, sealing. Cleans easily with soap and water. Available in white, beige, tan, gray finishes. Expected lifespan twenty to thirty years with minimal maintenance.
Disadvantages
Higher upfront investment at twenty to thirty-five dollars per linear foot installed. Limited color options compared to painted wood. Cheap versions crack in extreme cold. Can look artificial compared to natural wood grain, though honestly most people stop caring about that after the first year of not having to maintain anything.
Best Applications
Urban and suburban privacy fences in Fargo, Bismarck, Grand Forks, West Fargo. Ideal for HOA-controlled neighborhoods requiring clean uniform aesthetics.
Critical Selection Criteria
Ask potential suppliers for wall thickness specification. Anything under point one three five inches won’t survive long-term here. Request the manufacturer’s cold-temperature rating and warranty coverage for crack failures.
If they can’t produce those specs immediately, keep shopping.
2. Metal Fences: Steel and Aluminum for Maximum Durability
Metal fencing offers unmatched wind resistance and longevity, crucial for North Dakota’s open plains and exposed properties.
Aluminum Options
Powder-coated aluminum provides exceptional durability without rust concerns. Won’t corrode even in wet springs and snowy winters. Light weight makes installation easier, particularly for DIY projects.
I recommend aluminum for decorative fencing, pool enclosures, properties in high-wind zones where posts face constant lateral pressure. The material flexes slightly under wind load without failing, significant advantage over rigid materials that just snap.
Performance Metrics
- Lifespan: 25-30+ years
- Cost: $25-40 per linear foot installed
- Maintenance: Minimal, occasional washing
- Wind resistance: Excellent
Lightweight panels don’t catch wind like solid materials.
Limitations
Aluminum doesn’t provide complete privacy. Standard ornamental designs feature four to five inch picket spacing. You can add privacy slats but at that point solid vinyl or wood makes more sense.
Galvanized Steel and Wrought Iron
For maximum security and visual impact steel can’t be beaten.
Properly powder-coated galvanized steel withstands North Dakota’s harshest conditions indefinitely. I’ve installed commercial-grade steel fencing at industrial sites near Williston where security was paramount. After ten years exposed to oil field conditions and brutal winters those installations show zero degradation.
Trade-offs
Higher cost, thirty to fifty-plus dollars per linear foot. Heavier weight requires professional installation. Can develop surface rust if powder coating chips, though spot treatment fixes that.
Ideal Applications
Commercial properties, high-security residential installations, pool fencing in upscale developments, decorative property line markers.
3. Wood Fences: Classic Look with High Maintenance Requirements
Wood remains popular for its natural beauty and traditional appeal.
But North Dakota’s climate makes it challenging.
Cedar vs. Pressure-Treated Pine
Cedar contains natural oils that resist rot and insect damage. Dimensional stability means less warping compared to pine. Accepts stains beautifully, allowing customization to match home exteriors.
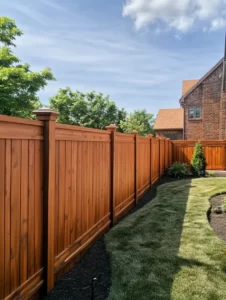
I’ve installed cedar privacy fences in established Fargo neighborhoods where homeowners wanted traditional looks. With proper annual maintenance these installations last fifteen to twenty years.
Cedar limitations include premium cost at fifteen to thirty dollars per linear foot installed. Requires annual sealing or staining. Color fades to silver-gray without treatment. Still vulnerable to freeze-thaw cracking.
Pressure-Treated Pine
This economical option uses chemical treatment to resist rot. Lower cost makes it attractive for large installations, particularly livestock fencing on ranches and farms.
The reality?
Pressure-treated pine struggles here. The wood’s natural tendency to warp combines disastrously with freeze-thaw cycles. Without religious maintenance, sealing before winter, repainting every two to three years, pine fences deteriorate rapidly.
I’ve seen seven-year-old pine fences that look twenty years old. Boards cupped and twisted, paint peeling in sheets, posts rotting at ground level despite treatment.
Critical Requirements for Wood Success
Seal or paint before first winter. No exceptions. Exposed wood absorbs moisture that expands during freezing, splitting boards from inside like a grenade going off in slow motion.
Set posts at proper frost depth. Use only heartwood or sapwood-free boards where possible, sapwood contains more moisture and degrades faster.
Budget three hundred to eight hundred dollars annually for maintenance materials and labor.
When Wood Makes Sense
Rural properties where traditional aesthetics matter. DIY enthusiasts willing to commit to maintenance. Temporary installations with ten to fifteen year horizons.
If you’re not genuinely willing to spend a weekend every fall sealing your fence, pick another material.
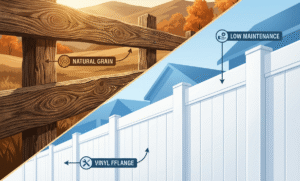
Read more: Wood vs. vinyl fence (cost, maintenance, lifespan)
4. Chain Link: Budget-Friendly Functionality
For ranch fencing, large properties, situations where budget trumps aesthetics, galvanized chain link delivers unbeatable value.
Performance Characteristics
Chain link’s open weave provides zero wind resistance, which is a massive advantage in gusty conditions. While solid fences act as sails catching every gust, wind passes straight through chain link without creating lateral pressure on posts.
Durability exceeds most expectations. I’ve measured twenty-year-old galvanized chain link installations showing minimal rust or degradation. The zinc coating protects steel wire effectively even through decades of moisture exposure.
Cost Analysis
At eight to fifteen dollars per linear foot installed, chain link costs forty to sixty percent less than wood and fifty to seventy percent less than vinyl for equivalent perimeters. For a ten-acre ranch, approximately twenty-six hundred forty linear feet of perimeter, this translates to twenty-one to forty thousand dollars in savings compared to premium materials.
When you’re fencing that much land the math changes everything.
Aesthetic Improvements
Modern vinyl-coated chain link addresses the industrial appearance. Available in black, green, brown, vinyl coating adds five to seven years to lifespan while creating more residential look.
Privacy slats, vertical strips woven through the chain pattern, convert see-through fencing into eighty to ninety percent privacy barriers. Slats add two to four dollars per linear foot but dramatically change the fence’s character.
Ideal Applications
Livestock containment on farms and ranches. Dog runs and pet enclosures. Budget-conscious residential perimeter fencing. Temporary construction site barriers.
Limitations
Even with slats chain link lacks aesthetic appeal of solid materials. For urban front yards and HOA neighborhoods it’s typically not permitted.
5. Composite Fences: Modern Hybrid Engineering
Composite fencing blends recycled wood fibers with plastic polymers.
Creates material that mimics wood’s appearance while delivering vinyl’s durability.
Engineering Advantages
The wood fiber content provides authentic grain texture and natural appearance. The plastic matrix prevents rot, insect damage, moisture absorption. The combination resists freeze-thaw damage better than pure wood. You get the best of both worlds, theoretically.
Quality composite handles North Dakota’s temperature extremes well. I’ve installed composite privacy fences in West Fargo subdivisions showing minimal fading or degradation after eight winters.
Performance Profile
- Lifespan: 20-30 years
- Cost: $25-45 per linear foot installed
- Maintenance: Occasional cleaning, no sealing required
- Appearance: Wood-like grain and texture in brown, gray, tan shades
Trade-offs
Composite costs more than wood while offering fewer design options. You can’t custom-stain composite like real wood, color selection is limited to manufacturer offerings.
Some composites fade over ten to fifteen years though premium brands include UV inhibitors that slow this significantly.
Best Use Cases
Homeowners wanting wood’s aesthetic without maintenance burden. Environmentally conscious buyers, composite uses recycled content. Premium urban privacy fencing.

Specialty Fences for Agricultural Applications
High-Tensile Wire with T-Posts
For large-scale livestock fencing high-tensile smooth wire offers the most economical solution at one to four dollars per linear foot.
The system uses galvanized steel wire tensioned between T-posts spaced twelve to sixteen feet apart. I’ve installed miles of this for cattle operations near Dickinson. Properly tensioned wire creates a psychological barrier, livestock learn to respect the boundary after minimal contact.
For horses I recommend adding a visible top rail, wood or vinyl, to prevent entanglement injuries.
Galvanized wire easily lasts twenty-five to thirty years. The system’s flexibility helps it survive impacts from livestock and equipment. Posts set below frost line stay stable for decades.
Woven Wire Fencing
For smaller livestock, sheep, goats, pigs, woven wire provides essential containment.
Tightly woven horizontal and vertical wires create small openings, two by four inch or four by four inch patterns, that prevent animal escape. Cost ranges from five to twelve dollars per linear foot depending on wire gauge and height.
Woven wire is significantly stronger than chain link, making it suitable for animals that aggressively test boundaries.
I recommend woven wire with a top strand of barbed wire for areas with predator pressure. This combination protects livestock while deterring coyotes and other threats.
Proper Installation for North Dakota Conditions
Material selection matters.
But installation quality determines whether your fence survives five winters or fifty.
Every spring I repair fences installed by contractors who either didn’t understand North Dakota’s requirements or cut corners to win low bids. Sometimes both.
Critical Rule Number One: Post Depth Below Frost Line
This cannot be emphasized enough.
Posts must extend below frost line by at least six inches, and you need to know the exact frost depth for your municipality, not generalized figures.
Regional Frost Line Depths (Always Verify with Local Building Department):
- Fargo: 54 inches
- West Fargo: 52-54 inches (conflicting documentation – verify)
- Bismarck: 48 inches below finished grade
- Minot: 48 inches
- Williston: 48 inches
- Grand Forks: Contact local building department
- Dickinson: Contact local building department
Always contact your local building department for exact specifications. Some jurisdictions specify depths in building codes making compliance legally mandatory.
Calculation Method
For a six-foot fence in Fargo:
- Above ground: 72 inches (fence height)
- Below ground: Frost line (54″) + 6 inches = 60 inches
- Total post length required: 132 inches (11 feet)
The Bell-Bottom Technique
Simply reaching frost line depth isn’t sufficient.
You need to prevent upward movement during freeze cycles, which requires belling the bottom, creating a wider base that acts as an anchor.
Process:
- Dig standard post hole to required depth
- At the bottom use a clamshell digger or hand auger to widen the hole by six to eight inches in diameter
- This creates a mushroom or bell shape
- Pour four to six inches of gravel into the widened base
- Set post and fill with concrete
The widened base creates mechanical resistance against upward frost movement. As ground freezes and expands the bell shape prevents the entire post and concrete footing from lifting.
I’ve measured this technique’s effectiveness across dozens of installations. Properly belled posts show zero movement even after severe winters. Standard straight-sided holes? Can experience two to four inches of heave displacement.
Post Installation Methods: Concrete vs. Pounded
Concrete Setting (Traditional Method)
Concrete provides maximum stability for heavy materials, wood panels, vinyl sections, gates. Creates a permanent rigid connection between post and ground.
Installation process: Dig hole to proper depth using post hole digger or power auger. Bell the bottom as described. Add four to six inches of gravel base and tamp firmly. Position post in hole, verify plumb in both directions using four-foot level. Brace post with temporary diagonal supports.
Mix and pour fast-setting concrete, crucial in temperatures below fifty degrees. Slope concrete slightly away from post at ground level for water drainage. Allow twenty-four to forty-eight hours cure time before attaching fence panels.
Cold Weather Considerations
Standard concrete sets poorly below forty degrees. In North Dakota’s extended cool seasons use fast-setting concrete formulated for cold weather. These mixes cure in twenty to thirty minutes even at temperatures down to twenty-five degrees.
For winter installations I add hot water, not boiling, aim for one hundred to one hundred ten degrees, when mixing concrete. This accelerates the chemical curing reaction and prevents freezing before the mix sets.
Pounded Posts (Direct Drive Method)
For chain link, T-posts, lightweight metal fencing, driving posts directly into the ground offers significant advantages.
Speed, lower cost, feasibility in frozen ground.
The method uses a post driver, either manual slide hammer or powered pneumatic or gas-driven pile driver, to pound posts into the ground through percussion force.
Surprisingly driven posts often outperform concrete-set posts in freeze-thaw conditions. Soil compacts tightly around the post during driving creating excellent lateral stability. More importantly direct-drive posts can flex slightly during frost heave then settle back into position during thaw cycles.
I’ve inspected fifteen-year-old driven T-post installations that remain perfectly vertical and tight. The soil’s freeze-thaw movement doesn’t affect them because there’s no rigid concrete collar to push against.
This method only works for metal posts with pointed or wedge-shaped ends. Wood and vinyl posts can’t be driven without damage. Rocky soil can bend or damage posts during driving.
Wind Load Considerations: Spacing and Bracing
North Dakota’s constant wind creates lateral forces that stress fence structures every single day of the year.
Proper design accounts for this continuous pressure.
Post Spacing Optimization
Standard fence installation specifies eight-foot post spacing. Works fine in wind-protected areas, residential neighborhoods with windbreaks, urban settings with surrounding structures.
For exposed locations?
Rural properties, new developments without mature trees, prairie settings, I reduce spacing to six to seven feet for solid privacy fences. This fifteen to twenty percent reduction in span length dramatically increases wind resistance by reducing panel flex and load per post.
Chain link and other open fences can maintain eight-foot or even ten-foot spacing since wind passes through without creating significant pressure.
H-Bracing for Long Runs
Any fence run exceeding one hundred to one hundred fifty linear feet requires H-braces.
Horizontal compression braces connecting line posts to prevent progressive failure. Without bracing a single damaged post can create cascading failure as stress redistributes to adjacent posts, like dominoes but expensive.
H-brace construction: Set two posts eight to ten feet apart. Connect posts with horizontal rail at top. Install diagonal compression brace from top of one post to bottom of the other. Secure all connections with through-bolts or heavy-duty screws.
For livestock fencing on ranches I install H-braces every one hundred feet and at every major directional change.
Solid vs. Gapped Fence Design
Solid privacy fences create maximum wind resistance, essentially a wall catching every gust.
In high-wind areas consider shadow box or board-on-board designs that create seventy to eighty percent privacy while allowing twenty to thirty percent airflow. These gapped designs reduce wind load by thirty to forty percent while maintaining functional privacy. The alternating overlapping boards block direct sight lines but let air pass through.
In twelve years installing fences across North Dakota I’ve never seen a properly belled post fail due to frost heave. Never. I have seen dozens of posts set in straight holes push out of the ground within two to three winters. The extra fifteen minutes per post hole pays for itself in avoided repairs and reconstruction. It’s like spending a dollar to save a hundred.
Victor Bravo, Project manager

Seasonal Installation Timing
Spring/Summer (April-September)
Optimal installation window for all fence types.
Ground has thawed completely making digging easy. Concrete cures at normal rates. Weather allows comfortable working conditions.
Trade-offs include peak season meaning higher contractor costs and longer wait times. I’ve seen four to six week backlogs during May through July when every homeowner wants fence work completed.
Best timing: Late April through June offers the sweet spot. Ground has thawed, contractors aren’t yet overwhelmed, you have full summer to enjoy the new fence.
Fall (October-November)
Excellent value window.
Ground remains workable but contractor demand drops significantly. I’ve offered fifteen to twenty percent discounts in October and November to fill my schedule before winter shutdown.
Critical deadline: Complete installation before ground freezes below six inches, typically late November in most of North Dakota. Once frost penetrates deeper digging becomes extremely difficult without specialized equipment.
Winter (December-March)
Possible but challenging.
Success requires specific techniques and equipment.
Methods for frozen ground include power augers with carbide-tipped bits that can penetrate frozen ground, heated concrete mixes preventing freezing before cure, driven metal posts that work even in frozen soil. Some contractors use hydraulic breakers to fracture frozen ground before augering.
If a contractor offers twenty-five to thirty percent off-season discount winter installation can deliver significant savings. Professional crews with proper equipment complete winter work successfully.
For DIY installers winter fence work is not recommended unless you have experience with cold-weather concrete and access to proper equipment.
Fence Applications: Choosing Based on Your Specific Goals
Privacy Fences for Urban and Suburban Properties
Urban homeowners in Fargo, Bismarck, Grand Forks typically prioritize privacy, noise reduction, aesthetic appeal.
The fence creates an outdoor room, private space separated from neighbors and street traffic.
Design Parameters
- Height: 6-8.5 feet depending on location and setback (verify local codes)
- Solid or near-solid construction for complete visual blocking
- Aesthetically pleasing on both sides (good neighbor design)
- Low maintenance requirement
Material Rankings for Privacy Applications
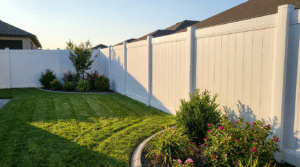
First Choice: Premium Vinyl
Delivers complete privacy with solid panels. Zero maintenance beyond occasional washing. Uniform appearance satisfies HOA requirements. Twenty to thirty year lifespan justifies higher upfront cost.
Cost: Twenty to thirty-five dollars per linear foot installed
Second Choice: Composite
Natural wood appearance with vinyl’s durability. Excellent for homeowners wanting traditional aesthetic. Slightly higher cost than vinyl.
Cost: Twenty-five to forty-five dollars per linear foot installed
Third Choice: Cedar with Maintenance Commitment
Premium natural appearance. Can be stained to match home exterior. Requires annual sealing or staining.
Cost: Fifteen to thirty dollars per linear foot installed plus annual maintenance
City-Specific Considerations
Each municipality has unique fence regulations.
Fargo:
- Backyard: Maximum 6.5 feet, or up to 8.5 feet if at least 3 feet from property line
- Front yard: Maximum 3 feet, or 4 feet if at least 75% light-permeable
- Permit required: Only for fences exceeding 8.5 feet
- Setback 2 feet minimum from sidewalk
- Always verify current requirements with Fargo Building Department
Bismarck:
- Backyard maximum six feet
- Front yard maximum four feet
- Permit required for all fences over six feet
- Important: Must call North Dakota One Call at 811 forty-eight hours before digging
West Fargo:
- Maximum height 6 feet for side and rear yards
- Front yard: Maximum 2.5 feet for solid fences; 4 feet for open fences with 50%+ transparency
- Setback varies by zoning district
- Verify with West Fargo Building Department
Grand Forks:
- Contact local building department for current requirements
HOA Requirements
Homeowners associations add another layer of restrictions beyond city codes.
I’ve worked in developments where HOAs mandate approved materials only, typically vinyl or specific wood types, approved colors like white, tan, natural wood tones, good neighbor construction where both sides look identical, pre-approval process requiring architectural review.
Always obtain written HOA approval before purchasing materials or starting installation.
I’ve seen homeowners forced to remove completed fences costing thousands of dollars because they didn’t follow HOA procedures. The associations have legal authority to enforce covenants and courts consistently uphold these requirements.
Livestock and Ranch Fences
Ranch and farm fencing prioritizes containment, durability, cost-effectiveness across large perimeters.
Aesthetic considerations take secondary importance to functionality.
Fencing by Livestock Type
Different animals require different containment strategies.
Horses present unique challenges. Strong enough to damage inadequate fencing yet vulnerable to injury from barbed wire.
Recommended Option One: High-Tensile Smooth Wire. Four to five strands spaced ten to twelve inches apart. Top strand at fifty-four to fifty-six inches. Wood or vinyl top rail adds visibility and reduces entanglement risk. Cost two to five dollars per linear foot installed. Lifespan twenty-five to thirty years.
Recommended Option Two: Vinyl Ranch Rail. Premium appearance for properties visible from road. Three or four horizontal rails. Excellent visibility prevents collision injuries. Cost fifteen to twenty-five dollars per linear foot. Lifespan twenty-five to thirty years.
Avoid barbed wire with horses. Horses can suffer severe lacerations from barbed wire during panic situations. I’ve responded to emergency calls where horses injured themselves badly enough to require veterinary surgery after encountering barbed wire fencing. Not something you want to experience.
Cattle
Cattle respect boundaries with minimal pressure. Less prone to testing fences than horses and can be contained with more economical options.
Recommended Option One: Barbed Wire. Four to five strands spaced eight to ten inches. Most economical for large pastures. Top strand at forty-eight to fifty inches. Cost one dollar fifty to three dollars per linear foot. Lifespan twenty to twenty-five years.
Recommended Option Two: High-Tensile Smooth Wire. Five to six strands for cattle. Safer than barbed wire for operations with public access. Slightly higher cost but longer lifespan. Cost two to four dollars per linear foot.
Sheep and Goats
Small livestock require tight spacing to prevent escape.
Goats are notorious escape artists. They climb, jump, squeeze through surprisingly small openings. If there’s a way out they’ll find it.
Required: Woven Wire. Two by four inch or four by four inch mesh pattern. Minimum forty-eight inches tall, goats can jump four-plus feet. Top strand of barbed wire deters climbing. Cost five to twelve dollars per linear foot. Lifespan twenty to twenty-five years.
Critical: Bury bottom edge. Goats will dig under fencing. Bury the bottom six to eight inches or secure with landscape staples every two to three feet.
Cost Analysis for Large Properties
A ten-acre square property has approximately twenty-six hundred forty linear feet of perimeter.
Fencing costs scale dramatically with material choice:
- High-tensile wire: $2,640-10,560 total
- Barbed wire: $4,000-8,000 total
- Woven wire: $13,200-31,680 total
- Chain link: $21,120-39,600 total
- Vinyl ranch rail: $39,600-66,000 total
For large operations material selection can mean a fifty thousand dollar-plus difference in total project cost.
Installation Considerations for Agricultural Fencing
Posts require deeper setting for livestock fencing, animals create constant pressure that suburban privacy fences never experience.
I set agricultural fence posts at proper frost depth plus six inches minimum, fifty-four to sixty inches in Fargo, forty-eight to fifty-four inches in Bismarck.
Corner posts and gate posts need extra reinforcement. These stress points carry tension from entire fence sections. I use six-inch diameter posts at corners versus four-inch for line posts, set fifty-four to sixty inches deep with concrete footings.

I’ve repaired dozens of livestock fences where corner posts failed because installers didn’t account for cumulative tension. A five hundred-foot fence section under high-tensile wire tension creates hundreds of pounds of force on corner posts. Proper H-bracing and oversized posts are non-negotiable. Cutting corners here guarantees failure within two to three years.
Victor Bravo, Project manager
Decorative and Property Line Fences
Not every fence needs to provide security or complete privacy.
Decorative fences define property boundaries, enhance curb appeal, add architectural interest without creating visual barriers.
Picket Fence
The classic American fence.
Evenly spaced vertical pickets create a welcoming traditional appearance.
Height three to four feet typical. Materials: Cedar traditional or vinyl low-maintenance. Best use: Front yards, garden borders, decorative boundaries. Cost twelve to twenty-five dollars per linear foot. Aesthetic: Traditional, welcoming, cottage-style.
Picket fences work particularly well in established neighborhoods with period homes. I’ve installed cedar picket fences in historic Fargo districts where homeowners wanted authentic character.
Ornamental Aluminum
Metal pickets with decorative finials create elegant property line markers without blocking views.
Height four to five feet typical. Style: Flat-top, spear-top, or decorative finials. Finish: Black powder coating most popular. Cost twenty-five to forty dollars per linear foot. Lifespan thirty-plus years.
These installations shine in upscale developments where architectural detail matters. The material’s durability and zero maintenance make it particularly attractive for busy professionals.
Split Rail
Rustic horizontal rails create countryside charm.
Popular for acreages and rural properties with road frontage.
Height three to four feet, two to three rails. Materials: Cedar authentic or vinyl maintenance-free. Best use: Rural property markers, decorative boundaries, equestrian properties. Cost eight to eighteen dollars per linear foot. Note: Not suitable for containing small animals.
Split rail fencing provides no containment for dogs, children, or small livestock. It’s purely decorative, a visual marker rather than a barrier.
Windbreak and Snow Fences
This fence category serves a purely functional purpose unique to prairie states.
Controlling wind-driven snow accumulation.
Snow Fence Design and Placement
Traditional snow fences use vertical wood slats with two-inch gaps creating fifty percent porosity. This specific design slows wind velocity without creating turbulence, causing snow to drop upwind of the fence rather than drifting beyond it.
Placement strategy: Install snow fences fifty to one hundred feet upwind, typically west or northwest, of the area you want to protect. Driveways, building entrances, livestock feeding areas. This distance allows snow to deposit in a controlled drift that doesn’t reach the protected zone.
Effectiveness: Properly positioned snow fences reduce drifting in protected areas by sixty to seventy percent.
I’ve installed snow fencing for rural homeowners who struggled with impassable driveways every winter. After installation they reported only minor snow accumulation even during blizzard conditions.
Seasonal Installation
Snow fences can be temporary, installed in November and removed in April. Many farmers use portable snow fence sections mounted on T-posts that take down and store during summer months.
Cost: Five to ten dollars per linear foot for basic wood snow fence
Legal Requirements and Permits in North Dakota
Statewide Fence Laws
North Dakota Century Code Chapter 47-26 establishes baseline fence requirements.
Legal Fence Definition
A legal fence must be at least four and one-half feet high and constructed of rails or timber, wire (barbed, smooth, or woven), or other materials providing equivalent function.
This definition primarily affects agricultural operations and property line disputes rather than residential fence installation.
Fence-In State Status
North Dakota law places containment responsibility on livestock owners.
If your cattle wander onto a neighbor’s property or public road you’re liable for damages, even if the neighbor has no fence. This creates legal obligation for farmers and ranchers to maintain functional perimeter fencing. Fence failure isn’t an acceptable excuse for livestock trespass.
Shared Fence Costs
When fencing sits directly on a property line both neighbors share maintenance and replacement costs unless a written agreement specifies otherwise.
This applies to both rural and urban properties.
I always recommend written agreements when installing boundary fences. Clear documentation prevents disputes when one neighbor wants to upgrade or replace aging fencing.
When to Call Before You Dig
North Dakota One Call: 811
This free service is legally mandatory.
Not optional.
Call at least forty-eight hours, excluding weekends and holidays, before digging any holes deeper than twelve inches. Within two to three business days utility companies will mark underground lines: natural gas, electric cables, water or sewer, telecommunications, fiber optic.
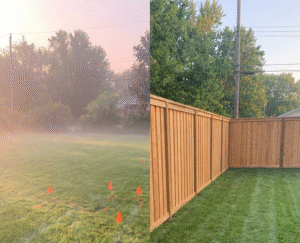
Markers use color-coded flags and paint:
- Red: Electric
- Yellow: Gas
- Blue: Water
- Orange: Telecommunications
- Green: Sewer
Penalties for Non-Compliance
Failure to call 811 before digging can result in fines up to twenty-five thousand dollars per violation, personal liability for repair costs potentially fifty thousand dollars-plus for major utility damage, service disruption affecting entire neighborhoods, serious injury or death from striking gas or electric lines.
I’ve witnessed contractors hit gas lines during fence installation.
The resulting emergency response, evacuation, repairs cost over seventy-five thousand dollars, far more than the fence project’s entire value.
Important Note
One Call marking is valid for twenty-one days. If your project takes longer you must call again to renew markings.
HOA Compliance
Homeowners associations create an additional regulatory layer beyond municipal codes.
These private contracts can impose restrictions that exceed city requirements.
Common HOA fence requirements include pre-approval mandatory, often requiring architectural review committee meeting, specific approved materials like vinyl or wood with no chain link, limited color palette such as white, beige, natural wood tones, maximum height restrictions sometimes stricter than city codes, construction standards requiring good neighbor design and professional installation, maintenance requirements as peeling paint or damaged sections may violate covenants.
Approval Process Timeline
Budget two to six weeks for HOA approval processes.
Some associations meet monthly, others quarterly. Missing a meeting deadline can delay your project significantly.
Violation Consequences
Installing without approval or violating approved plans can result in forced removal at owner’s expense, daily fines until compliance achieved, legal action and attorney fees, liens against property.
I’ve seen homeowners forced to remove eight thousand dollar fences because they didn’t follow HOA procedures.

Cost Analysis: What to Expect in North Dakota
Material and Installation Costs (2024-2025 Pricing)
Prices reflect typical North Dakota rates, labor and materials included.
But understand something. Geographic location matters. Site conditions matter. Seasonal timing can swing costs by twenty to thirty percent. These numbers give you a baseline, not a guarantee.
Typical Costs Per Linear Foot:
- Chain Link (4 ft): $8-15
- Pressure-Treated Pine (6 ft): $10-20
- Cedar (6 ft): $15-30
- Vinyl (6 ft): $20-35
- Aluminum (4-6 ft): $25-40
- Composite (6 ft): $25-45
- High-Tensile Wire: $1-4
- Woven Wire (4 ft): $5-12
For a 150-foot project costs range from around $1,200 for basic chain link up to $6,750 for premium composite.
Real-World Project Examples
Example One: Suburban Privacy Fence (Fargo)
Residential backyard. One hundred fifty linear feet. Premium vinyl at six feet height with one four-foot gate.
Total Cost: $3,800-5,500
Timeline? Two to three days installation. Expected lifespan stretches twenty-five-plus years. Annual maintenance runs fifty to one hundred dollars, basically just washing it down occasionally.
This represents the typical urban privacy fence I complete most frequently in Fargo and Bismarck suburbs. Standard stuff.
Example Two: Ranch Livestock Fence (Rural Burleigh County)
Ten-acre cattle pasture requiring twenty-six hundred forty linear feet of perimeter. Five-strand high-tensile smooth wire at fifty inches height with twelve-foot post spacing.
Total Cost: $6,300-10,600
Timeline stretches five to seven days with a two-person crew. Expected lifespan? Easily twenty-five to thirty years. Annual maintenance runs two hundred to four hundred dollars for tension checks and minor repairs, nothing major unless something catastrophic happens.
Example Three: Decorative Front Yard (Bismarck)
Front property line. Just fifty linear feet of black ornamental aluminum at four feet with spear-top finials.
Total Cost: $1,500-2,200
One day installation. Lifespan exceeds thirty years. Maintenance? Minimal, wash it occasionally.
DIY vs. Professional Installation
Cost Savings Potential
DIY eliminates forty to sixty percent of project costs.
The labor component vanishes entirely. For a one hundred fifty-foot vinyl fence professionally installed at forty-five hundred dollars, materials alone might run two thousand to twenty-five hundred. Your savings land somewhere around two thousand to twenty-five hundred dollars depending on how efficiently you work.
Tools and Equipment Required
Essential items include post hole digger or power auger rental at fifty to one hundred fifty dollars per day, four-foot level, tape measure, string line and stakes, shovel.
Helpful additions include cordless drill, circular saw, wheelbarrow.
Safety gear includes work gloves, safety glasses, work boots.
Total tool investment for homeowners starting from scratch? Around five hundred to nine hundred dollars.
Power auger rental dramatically reduces digging time and physical effort. Worth every penny of that one hundred to one hundred fifty dollar cost for projects over fifty feet. Trust me on this.
Time Investment
DIY projects devour two to three times more time than professional installation.
- Fifty-foot fence: Two to three days DIY versus one day professional
- One hundred fifty-foot fence: Four to six days DIY versus two to three days professional
- Three hundred-foot fence: Eight to twelve days DIY versus four to five days professional
When DIY Makes Sense:
Simple designs like chain link, T-post with wire, basic picket. Straight runs without weird corners or grade changes. You’ve got available time and physical capability. Projects under one hundred linear feet. Budget constraints make professional costs prohibitive.
When to Hire Professionals:
Premium materials requiring precision like vinyl panels or composite. Uneven terrain with elevation changes. Projects exceeding two hundred linear feet. Winter installation needing specialized equipment. You want warranty coverage on labor. Time constraints. Physical limitations preventing heavy digging and lifting.
Hidden Costs to Budget For
Many homeowners budget for materials and labor, then get blindsided by additional expenses they never anticipated.
Permit fees run fifty to two hundred dollars depending on municipality. Property survey costs three hundred to eight hundred dollars if property lines aren’t clearly marked, and you need this to avoid encroachment disputes with neighbors who might otherwise enjoy watching you tear down and rebuild.
Old fence removal adds three to five dollars per linear foot plus disposal fees for old materials adding one hundred to three hundred dollars.
Ground obstacles like unexpected rocks, tree roots, buried debris can increase installation time twenty to forty percent. Some contractors charge extra for difficult digging conditions, others just build it into their bids.
Gates add cost. Standard four-foot walk gates add two hundred to four hundred dollars. Double-drive gates, ten to twelve feet, cost six hundred to twelve hundred dollars depending on material.
Staining or sealing for wood runs one to three dollars per linear foot for initial treatment, one hundred fifty to four hundred fifty dollars for a one hundred fifty-foot fence. Annual resealing costs one hundred to three hundred dollars for materials and labor.
Grade changes requiring stepped or contoured fence sections on slopes need additional materials and labor, adding fifteen to thirty percent to base costs.
Total hidden cost range: Budget an additional five hundred to twenty-five hundred dollars beyond base material and installation costs for typical residential projects.
That range sounds wide because projects vary wildly.
I support DIY fence installation for appropriate projects. I started that way myself, learned by doing. However I’ve repaired countless DIY installations where homeowners underestimated complexity. Vinyl fence panels require precise post positioning. Even one-quarter inch variation causes installation problems that multiply as you progress. High-tensile wire needs proper tensioning equipment and technique, not something you improvise. Know your skill level honestly before committing to DIY on complex projects. Pride heals faster than your budget recovers from mistakes.
Victor Bravo, Project manager
Maintenance Requirements by Material Type
Vinyl: Minimal But Not Zero
Vinyl’s maintenance-free reputation oversimplifies reality.
While dramatically lower than wood, vinyl still requires attention. Not much, but some.
Annual tasks include washing panels with garden hose and mild soap to remove dirt, mold, pollen buildup. Inspect post stability after spring thaw for frost heave check. Tighten loose screws and bolts at panel connections. Check gate hinges and latches for proper alignment.
Every five years perform detailed crack inspection particularly at stress points like corners and gate posts. Replace damaged panels if needed, usually covered by manufacturer warranty. Inspect and replace worn gate hardware.
Annual cost: Fifty to one hundred fifty dollars, primarily time investment with minimal material costs.
Expected lifespan: Twenty to thirty years with proper care.
Wood: High-Maintenance for Longevity
Wood fence survival in North Dakota depends entirely on consistent maintenance.
Neglect accelerates deterioration dramatically. There’s no gradual decline. It happens fast.
Annual tasks include complete inspection for rot, cracks, loose boards, warping in spring. Power wash to remove dirt and mildew. Apply wood sealer or stain to all surfaces, critical, do this every year without exception. Replace damaged boards immediately, don’t let them linger. Tighten or replace rusted fasteners.
Every two to three years strip old finish if paint or stain is peeling. Complete refinishing with quality exterior-grade products. Don’t cheap out here.
Annual cost: Three hundred to eight hundred dollars. Materials one hundred to two hundred dollars, labor two hundred to six hundred dollars if hiring professionals.
Lifespan without maintenance: Five to seven years before significant deterioration.
Lifespan with proper care: Fifteen to twenty years.
The difference is stark.
I’ve seen six-year-old cedar fences that look twenty years old due to neglect. I’ve also seen eighteen-year-old pressure-treated fences that remain structurally sound due to religious maintenance, owners who treat annual sealing like a sacred ritual.
Metal: Rust Prevention is Key
Aluminum
Powder-coated aluminum is genuinely low-maintenance, one of the few materials that actually lives up to that claim.
The finish resists corrosion indefinitely under normal conditions.
Annual tasks include washing with mild soap to maintain appearance and inspecting for damaged powder coating, rare but worth checking.
Annual cost: Under fifty dollars.
Expected lifespan: Thirty-plus years.
Galvanized Steel
Steel requires more attention than aluminum due to rust potential. It’s the trade-off for superior strength.
Annual tasks include inspecting for rust formation particularly at ground level where moisture accumulates. Touch up damaged powder coating immediately with matching paint, don’t wait. Clean and lubricate gate hinges.
Every two to three years apply rust inhibitor to exposed metal areas.
Annual cost: One hundred to three hundred dollars depending on rust severity.
Expected lifespan: Twenty-five to thirty-five years with proper rust prevention.
Chain Link: Inspect and Forget
Chain link requires minimal intervention.
One reason it dominates agricultural applications. Ranchers don’t have time for high-maintenance fencing.
Every two to three years inspect fabric for rust particularly at ground level. Check and tighten sagging sections. Inspect and replace damaged posts if needed. Lubricate gate rollers and hinges.
Annual cost: Fifty to one hundred fifty dollars.
Expected lifespan: Galvanized fabric fifteen to twenty years. Vinyl-coated fabric twenty to twenty-five years. Posts and framework twenty-five to thirty years.
Wood fence maintenance isn’t optional in North Dakota. It’s the price of admission. If you’re not willing to commit six to eight hours and two hundred to three hundred dollars annually to sealing and repairs, choose a different material and save yourself the heartache. I’ve watched too many homeowners invest five thousand dollars in beautiful cedar fences only to see them deteriorate into eyesores within a decade because they skipped annual sealing. The wood doesn’t forgive neglect here.
Victor Bravo, Project manager

Common Problems and Solutions
Problem One: Posts Heaving Out of Ground
Symptom: Posts lean at angles. Fence sections sag. Posts rise two to four inches above original height like the earth is spitting them out.
Root Cause: Posts installed above frost line or without belled bottom, allowing frost heave to push entire post-concrete assembly upward.
Immediate Fix:
Excavate around affected post to full depth. Remove existing concrete if present. Re-dig hole to proper depth, verify with local building department for your specific municipality. Bell bottom to create anchor. Reset post with fresh concrete. Allow forty-eight hours cure before reattaching fence panels.
It’s tedious work but there’s no shortcut.
Long-Term Solution: If multiple posts show heaving, the entire fence installation is compromised. Complete removal and proper reinstallation will be necessary within two to three years. Painful truth, but better than watching progressive failure.
Prevention: Proper installation the first time. Post depth below frost line is non-negotiable.
Problem Two: Wood Splitting and Cracking
Symptom: Vertical cracks in boards. Cupping where boards curve across width. Splitting at fastener locations.
Root Cause: Freeze-thaw cycles driving moisture expansion in unsealed wood.
Immediate Fix:
Replace structurally compromised boards, those with cracks exceeding one-third board width are done. Sand damaged areas on remaining boards. Apply wood conditioner to open grain. Apply two coats of quality exterior sealer or stain to entire fence, not just damaged sections.
Prevention: Annual sealing before winter. September to October window works best. Never let wood go unsealed through a North Dakota winter. Moisture absorption during fall saturates wood that then splits during freeze cycles. Guaranteed failure mechanism.
Problem Three: Fence Leaning or Wind Damage
Symptom: Fence sections lean noticeably. Posts tilted. Panels separated from posts.
Root Cause: Insufficient post depth for wind load, post spacing too wide for solid fence design, or posts not set in concrete.
Temporary Stabilization:
Install diagonal braces from tilted posts to ground stakes. Prevents further movement until permanent repairs completed. Buys you time.
Permanent Solution:
Remove affected fence sections. Excavate existing posts. Install new posts at proper depth with concrete. Reduce post spacing to six to seven feet if location is wind-exposed. Add H-braces for runs exceeding one hundred feet. Reinstall panels.
Prevention:
Proper post depth and spacing during initial installation. Consider shadow-box or board-on-board designs in exposed locations, reduces wind resistance thirty to forty percent while maintaining functional privacy. Add intermediate posts to existing installations showing stress before they fail completely.
Problem Four: Vinyl Cracking in Extreme Cold
Symptom: Cracks appearing in vinyl panels or posts, typically at stress points like corners and gate connections.
Root Cause: Low-quality thin-walled vinyl, under point one two zero inches wall thickness, becomes brittle at temperatures below negative twenty-five degrees.
Immediate Fix:
Contact manufacturer to verify warranty coverage. Replace cracked panels with premium-grade replacements. Document damage with photos for warranty claims. Manufacturers sometimes resist coverage without photographic evidence.
Long-Term Solution: If cracks appear in multiple locations, the vinyl quality is insufficient for North Dakota climate. Complete replacement with premium-grade vinyl, point one three five inches-plus wall thickness, will be necessary. Painful reality but cheaper than ongoing repairs.
Prevention: Only purchase vinyl fencing with wall thickness of point one three five inches or greater, virgin vinyl not recycled PVC, manufacturer’s cold-temperature rating to negative forty degrees minimum, written warranty covering crack failures in extreme cold.
Don’t accept verbal assurances. Get it in writing.
Read also: 5 signs it’s time to replace your fence
Finding the Right Contractor in North Dakota
Questions to Ask Before Hiring
Licensing and Insurance Verification:
Ask if they’re licensed to operate in North Dakota. North Dakota doesn’t require general contractor licenses for fence installation, but legitimate businesses carry proper registrations and tax permits. Ask to see them.
Ask if they carry liability insurance and workers’ compensation. This protects you from liability if workers are injured on your property or if installation damages your home or utilities. Request certificates of insurance and verify coverage amounts. General liability one million dollars minimum, workers’ compensation statutory limits.
North Dakota Climate Experience:
Ask how long they’ve been installing fences in North Dakota. You want someone with multiple seasons of local experience. Not a contractor who just moved from warmer climates and thinks they can figure it out.
Ask how deep they set posts in this area. Correct answer: Verified local frost depth for your specific municipality plus six inches. Wrong answer: Thirty-six inches, forty-two inches, or standard depth. Walk away if you hear the wrong answer.
Ask if they bell the bottom of post holes. Correct answer: Yes, always. Wrong answer: Not necessary or never heard of that. This question separates professionals from amateurs instantly.
Ask if they can show you installations they completed five-plus years ago. Long-term performance demonstrates quality. Recent installations look good regardless of quality. Check back in five winters to see what actually survives.
Warranty and Guarantee:
Ask what warranty they provide on installation labor. Reputable contractors offer one to five year labor warranties. Material warranties come from manufacturers, but labor coverage is contractor’s responsibility.
Ask what happens if the fence fails due to frost heave. This reveals whether they understand local conditions and stand behind work quality. Listen carefully to their answer. Hesitation or deflection tells you everything.
Process and Timeline:
Ask about their typical timeline from contract to completion. Understand scheduling realities. During peak season, May through August, wait times can extend four to eight weeks. If someone promises immediate start during peak season, they’re either lying or desperate for work.
Ask if they handle permit applications. Good contractors manage permit processes, saving you time and ensuring code compliance.
Read also: What to expect during your fence installation day
Red Flags to Avoid
Requires one hundred percent payment upfront. Standard practice is thirty to fifty percent deposit, remainder upon completion. Full prepayment leaves you vulnerable if contractor abandons project, and it happens more often than you’d think.
Cannot provide North Dakota references. Out-of-state contractors or new businesses may not understand local climate requirements. References matter.
Proposes post depth under local frost line plus six inches. Absolute disqualifier. This person either doesn’t understand North Dakota conditions or prioritizes profit over quality. Either way, not your contractor.
Doesn’t mention frost line, climate, or seasonal factors. Professionals lead with climate considerations. It’s the defining factor for fence success here. If they’re not talking about it unprompted, they’re not thinking about it.
Significantly lowest bid without explanation. If one quote is thirty to forty percent below others, the contractor is cutting corners somewhere. Shallow posts, inferior materials, inexperienced labor. Something gives.
No written contract. Verbal agreements provide zero protection. Contracts should specify materials including brands and grades, post depths, timeline, payment schedule, warranty terms. Everything in writing.
Pressures immediate decision. Quality contractors don’t use high-pressure sales tactics. They’re busy enough with referrals that they don’t need to pressure anyone.

Step-by-Step: Installing Your Own Fence (DIY Guide)
For homeowners willing to invest time and physical effort, DIY fence installation offers substantial cost savings.
This guide focuses on basic post-and-panel installation suitable for chain link or simple wood fences.
Tools and Materials Checklist
Essential Tools:
Post hole digger or power auger rental, highly recommended for ten-plus posts. Four-foot level. One hundred-foot tape measure. String line and stakes. Shovel. Wheelbarrow. Circular saw or miter saw for wood fence cuts. Power drill with bits. Safety equipment including work gloves, safety glasses, steel-toe boots.
Materials:
Fence posts. Calculate perimeter divided by spacing plus corner and gate posts plus ten percent extra. Fence panels or pickets. Fast-setting concrete, ten to twelve bags per post typical. Gravel, four to six inches per hole equals point five cubic feet per post. Galvanized or stainless steel screws or nails. Post caps. Gate hardware including hinges and latches.
Installation Process (10 Critical Steps)
Step One: Plan and Measure
Mark your fence line with stakes and string.
Walk the entire perimeter identifying corner locations, gate positions, grade changes requiring stepped panels, obstacles like trees, utility pedestals, drainage issues.
Measure total linear footage and calculate posts needed.
Formula: Number of posts equals total feet divided by spacing plus one.
Example: One hundred fifty feet divided by eight-foot spacing equals eighteen point seven five, round to nineteen posts.
Critical:
Call 811, North Dakota One Call.
This isn’t optional. It’s legally mandatory. Call at least forty-eight hours before digging. Utilities will mark lines within two to three business days. Proceed with digging only after lines are marked. Not before.
Step Two: Dig Post Holes
Specifications include depth verified for your local frost depth plus six inches minimum. Diameter three times post width, twelve-inch diameter for four by four posts. Bell the bottom by widening base six to eight inches using clamshell digger.
Pro tip: Power auger rental dramatically reduces digging time. The one hundred to one hundred fifty dollar rental cost is worth it for projects with eight-plus posts. Your back will thank you.
Rocky soil requires patience. You may need a digging bar to break up rocks before augering.
Step Three: Add Gravel Base
Pour four to six inches of crushed gravel into each hole. Tamp firmly with two by four or hand tamper.
Purpose: Drainage. Water pooling at post bases accelerates rot for wood or creates freeze-expansion pressure for concrete. Gravel allows water to disperse instead of accumulating.
Step Four: Set Corner and End Posts First
Place post in hole. Check plumb, vertical, in both directions using level. This matters more than you think. Install temporary diagonal braces, two by fours nailed to post and staked to ground. Mix fast-setting concrete following package directions exactly.
Pour concrete around post, tamping every few inches to eliminate air pockets. Slope concrete surface away from post for water runoff. Recheck plumb before concrete sets. You have ten to fifteen minutes with fast-setting mix, maybe less in hot weather.
Allow twenty-four-plus hours cure before proceeding.
Corner posts anchor the entire fence line. Take extra time ensuring perfect vertical alignment. Errors here multiply across the entire installation.
Step Five: Run String Lines
Stretch string tightly between corner and end posts at the height where the fence top will sit.
This guides intermediate post placement and ensures consistent height across the entire installation. Without string lines you’re guessing, and guesses compound into crooked fences.
Step Six: Set Line Posts
Using string as guide, place each post in hole. Align with string line. Check plumb with level. Brace temporarily. Pour and tamp concrete. Final plumb check.
Work in sections, four to six posts at a time, rather than attempting the entire fence in one marathon session. This maintains focus and quality. Fatigue leads to mistakes.
Step Seven: Concrete Cure Time
Minimum waiting periods include fast-setting concrete at twenty-four hours before light work. Regular concrete requires forty-eight to seventy-two hours. Full cure takes seven days for maximum strength.
Do not attach panels or apply stress to posts before adequate cure time. Premature loading can shift posts out of alignment, and you won’t notice until it’s too late to fix easily.
Step Eight: Attach Rails or Panels
For panel fences like vinyl or pre-assembled wood, slide panel into post channels for vinyl or position against posts for wood. Level panel before fastening. Secure with manufacturer-specified fasteners. Don’t improvise here. Check each panel for level before proceeding to next.
For rail fences with individual pickets, attach horizontal rails to posts. Mark picket spacing, use template for consistency. Attach pickets to rails. Maintain consistent spacing and alignment throughout.
Step Nine: Install Gates
Gates require precise positioning.
Any misalignment causes binding or sagging, and gates get used frequently, so problems multiply fast.
Hang gate on hinge-side post following manufacturer instructions. Check swing clearance, gate should open and close smoothly without scraping. Adjust hinges for perfect operation. Install latch hardware on opposite post.
Test operation repeatedly. Gates that work marginally when new will bind within weeks as wood swells or metal settles.
Step Ten: Finishing Touches
Install post caps, prevents moisture entry that leads to rot or freeze damage. Apply stain or sealer to wood fences immediately, within twenty-four hours if possible. Clean up work area and dispose of concrete bags and wood scraps. Take photos for future maintenance reference.
Estimated Time Investment:
One hundred linear feet: Three to five days, two people. Two hundred linear feet: Six to nine days, two people. Include concrete cure days in timeline. You can’t rush chemistry.
DIY fence installation tests patience and physical endurance. The digging phase is brutally hard work. Even with power auger you’ll muscle one thousand-plus pounds of concrete per one hundred feet of fence. Budget twice the time you initially estimate. Every DIY fence I’ve consulted on took longer than homeowners expected. That said, the satisfaction of completing it yourself and saving two thousand to five thousand dollars makes the effort worthwhile for many people. Just know what you’re getting into before you start.
Victor Bravo, Project manager
Conclusion: Making Your Fence Investment Count
Remember Jason from Fargo?
His four thousand dollar wooden fence failed after two winters because the contractor set posts only thirty-six inches deep. Complete failure. Posts heaving out of the ground, boards split, sections leaning at impossible angles.
After learning proper installation requirements Jason chose premium vinyl with posts set to Fargo’s verified frost depth and belled bottoms. Three brutal winters later his fence stands perfectly vertical without a single crack.
Total cost: Forty-eight hundred dollars for one hundred fifty feet. Zero maintenance expenses. Complete peace of mind.
And Mike, ranch owner near Minot who needed livestock fencing for ten acres. He installed high-tensile wire himself using proper forty-eight-inch post depths and corner bracing.
Investment: Seventy-five hundred dollars in materials plus six days of hard work with a helper.
Savings: Fifteen thousand dollars-plus compared to professional installation quotes.
Five years later the fence contains his horses perfectly. Not a single repair needed.
Your fence represents significant investment. Three thousand to eight thousand dollars for typical residential projects, potentially twenty thousand-plus for large properties. Making the right decisions now determines whether you enjoy decades of reliable service or face expensive replacements within years.
Key Takeaways
North Dakota’s climate demands specific installation practices. Frost line depth varies by municipality.
Always verify with your local building department and add six inches minimum. This isn’t a suggestion. It’s a survival requirement.
Installation quality matters more than material selection. Even premium vinyl or composite fails if posts are shallow. Even budget chain link succeeds with proper installation.
Cheapest rarely means most economical. Calculate cost-per-year-of-service.
Match fence type to specific purpose. Urban privacy needs differ dramatically from ranch livestock containment.
Permits and regulations aren’t optional. Verify requirements with your local building department and always call 811 before digging. Penalties for not calling 811 can reach twenty-five thousand dollars per violation.
Frequently Asked Questions
This varies by municipality based on local frost depth. Always verify with your local building department for exact requirements. General guidance based on verified data:
- Fargo: 54 inches minimum plus six inches (total 60 inches)
- Bismarck: 48 inches below finished grade plus six inches (total 54 inches)
- Minot: 48 inches plus six inches (total 54 inches)
- Williston: 48 inches plus six inches (total 54 inches)
- West Fargo: 52-54 inches (conflicting documentation - verify with building department) plus six inches
- Grand Forks, Dickinson: Contact local building department
These depths place posts below the frost line, the maximum depth ground freezes during winter. Shallow installation leads to frost heave failures within one to three winters as freezing soil pushes posts upward.
Yes, but it requires specialized techniques and equipment.
Frozen ground challenges digging. Standard tools cannot penetrate frost. You’ll break equipment trying. Professional installers use hydraulic breakers to fracture frozen earth, heavy-duty augers with carbide bits, heated concrete mixes that cure despite cold temperatures.
Metal T-posts can be driven even in frozen soil using pneumatic drivers. Wood and vinyl installations become significantly more complex. Possible but expensive.
Winter installation offers one major advantage: Twenty to thirty percent off-season discounts from contractors filling slow-season schedules. For large projects these savings can justify additional complexity.
Best timing? May through June when ground has thawed and contractors aren’t yet overwhelmed, or September through October when ground remains workable and off-season pricing begins.
Depends on property size.
Small properties under one hundred feet: Chain link at eight to fifteen dollars per linear foot provides the most economical complete installation.
Large properties including ranches and farms: High-tensile wire at one to four dollars per linear foot delivers dramatic cost savings across multi-acre perimeters.
Critical perspective: Cheapest initial cost differs fundamentally from best long-term value.
Chain link at ten dollars per foot lasting twenty years costs fifty cents annually per foot. Cheap pressure-treated pine at twelve dollars per foot failing after eight years costs one dollar fifty annually per foot. Three times more expensive long-term despite lower upfront price.
Calculate cost-per-year-of-service, not just installation price.
Premium vinyl, point one three five inches-plus wall thickness made from virgin PVC, withstands temperatures to negative forty degrees without cracking.
I’ve documented quality vinyl surviving fifteen-plus North Dakota winters without failure. Solid performance under extreme conditions.
Cheap vinyl, under point one two zero inches thickness using recycled PVC, becomes brittle below negative twenty-five degrees. Cracks typically appear after first or second severe winter at stress points including corners, gate connections, panel joints. Once cracking starts it accelerates.
Solution: Purchase only premium-grade vinyl with minimum point one three five inches wall thickness, virgin PVC composition not recycled, manufacturer’s written cold-temperature warranty, specific North Dakota installer experience.
Ask suppliers for spec sheets documenting wall thickness and temperature ratings before purchasing. If they can’t produce specs immediately, shop elsewhere.
Fargo:
- Permits required only for fences exceeding 8.5 feet in height
- Standard 6-6.5 foot backyard privacy fences typically don’t require permits
- Front yards limited to 3 feet (or 4 feet if at least 75% light-permeable)
- Always verify current requirements with Fargo Building Department
Bismarck:
- Permits required for fences over 6 feet
- Similar front yard restrictions, 4 feet maximum
Both cities: Always call 811, North Dakota One Call, before digging regardless of permit requirements. Utility marking is legally mandatory. Permits may be optional in some cases but utility marking never is.
Verification step: Contact your specific city building department before starting any project. Regulations change and some neighborhoods have additional HOA requirements beyond city codes.